Issuing an SD-JWT VC (EUDI) via OID4VCI
Overview
This guide walks you through issuing an SD-JWT VC to a EUDI Wallet:
- Create a key and upload an X.509 certificate as an identifier — establishes you as a trusted issuer and is used to sign credentials
- Create a credential schema — defines the kind of credential you will issue (for example, a Loyalty Card or EU PID)
- Fill out claims and issue the credential
The certificate identifier and schema are one-time setup. Once they exist, issuing a credential is just the final step.
Prerequisites
- Permissions to create identifiers and schemas, and issue credentials
- Procivis One Wallet or another compatible wallet app installed on your mobile device
Steps
Turn on the EUDI country profile
- In the top-right country profile dropdown, select EU Digital Identity Wallet
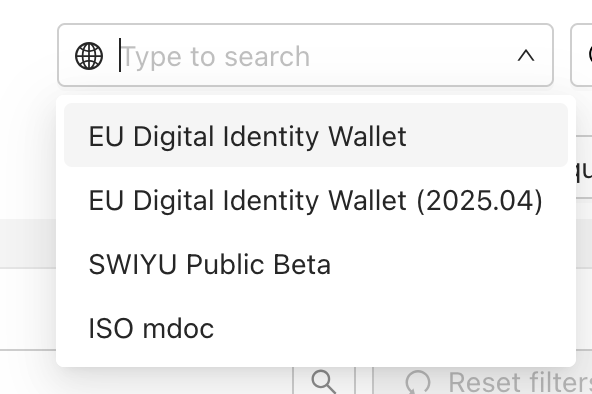
This automatically filters the UI to show you only options that comply with the chosen ecosystem.
Applying the country profile is optional, but helps by providing guardrails.
Create a certificate identifier
- Navigate to Identifiers
- Click Identifiers in the left sidebar
- Click the Keys tab
- Create a key
- Click New
- Enter
EUDI Keyfor the key name - Select Internal for storage location
- Select ECDSA or EdDSA for key type
- Click Next step → Generate
- Generate a certificate signing request (CSR)
- Find your new key in the Keys tab
- In the Actions column, click Generate CSR
- Select Generic for the profile
- Fill out at least the common name → Download
- Use the CSR to get a certificate. What you do with the CSR depends on
your context:
- For productive use cases → submit the CSR to a Certificate Authority
- For development and testing → use a tool such as OpenSSL to generate a self-signed root certificate and sign the CSR
- Upload the certificate as an identifier
- Click Identifiers in the left sidebar
- Click New
- Enter
EUDI Certificatefor the identifier name - Select Certificate for the type → Next step
- Click New → Select your certificate → Save
- Click Next step → Select EUDI Key (or whatever you called your key)
- Click Next step → Generate
Once you have created your certificate identifier you can reuse it for all EUDI issuance. For productive use cases, this will be the certificate you must get added to the relevant trust lists.
Create a credential schema
- Navigate to Credential schemas
- Click Credential schemas
- Click New credential schema
- Set up the schema
- Enter
Loyalty Cardfor the schema name- Alternatively, if you want to create some other kind of credential
(for example,
EU PID, enter that here and follow instructions below for externally-defined schemas)
- Alternatively, if you want to create some other kind of credential
(for example,
- Select IETF SD-JWT VC for the format
- Select Basic for Wallet key attestation
tip
You can also select a higher level of attestation; this may prevent some wallets from accepting your credential offer. Hardware support for Secure Element is especially irregular with Android devices.
- Select Token Status List for revocation method
- Check Allow suspension box
- Click Advanced options and enter "urn:eudi:eaa:loyalty-card:1"
for Document type
tip
To create an externally-defined schema (for example, an EU PID), ensure you input the document type (
urn:eudi:pid:1), then map the attributes according to the schema's data model. In this guide we will create a Loyalty Card. - Click Next step
- Enter
- Define the attributes
- Click Add another attribute three times
- For the attributes, enter
membership_tierorganization_nameissuing_countrymember_id
- Click Next step
- Choose your credential design → Next step → Save
Once you have created this credential schema you will reuse it any time you want to issue a Loyalty Card.
Issue the credential
- Set up issuance
- On the schema you created, click Issue
- Select OpenID4VCI final 1.0 (HAIP) for protocol
- Select EUDI Certificate for issuer → Next step
- Fill out attributes
- Enter values for each credential claim
- Click Next step → Issue
→ An issuance QR code appears
Accept the credential
- Using your wallet app, scan the QR code → Accept the issuance